Wednesday, April 17, 2024

Watercoloring Diecuts When You Don't Know How to Watercolor


The question I get a lot is, how do you paint your dies or your background? My answer would be, like a kindergartener. 

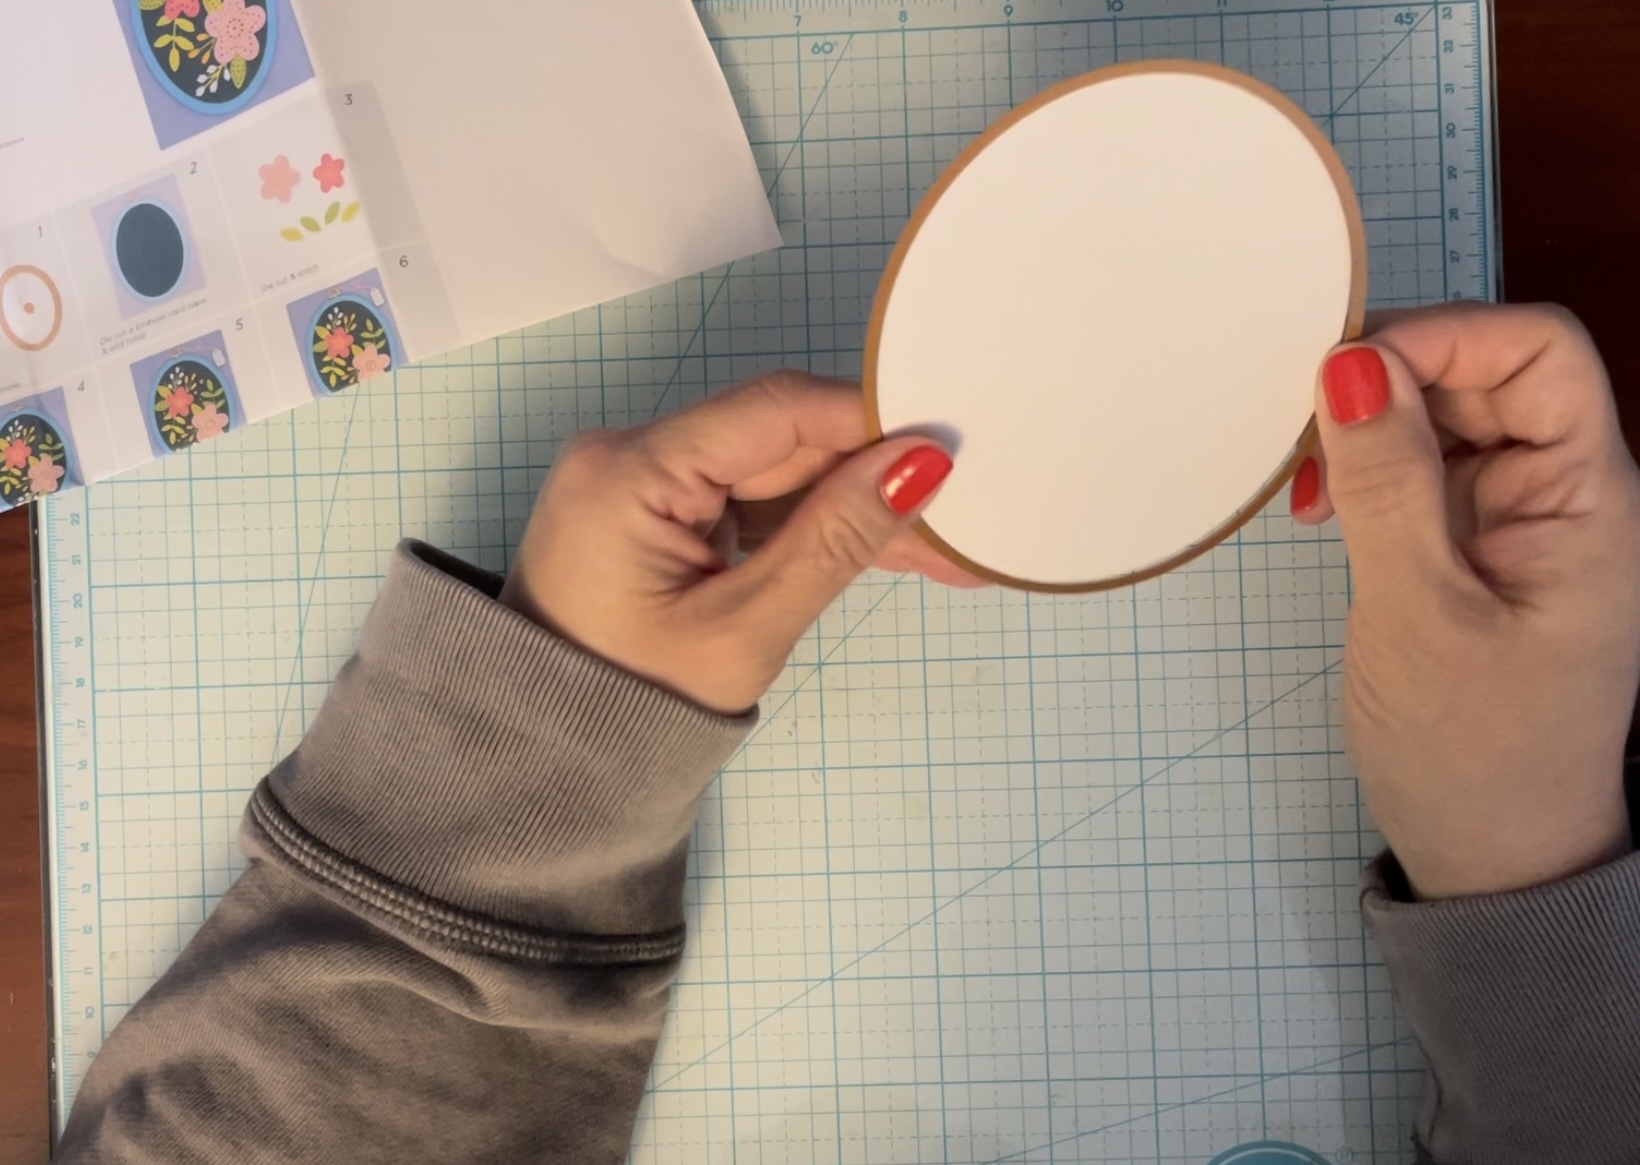
For this card, I ripped a page out of my Canson Mixed Media pad. I bought it at Michaels, it's lightweight paper, it says 98 lb. The pages are 5.5" x 8.5". This paper isn't anything special, it's lightweight watercolor paper.

Below is a video on how I painted the paper to be diecut. I bought Altenew's Pink Star Tulip for this card. I wet the paper using a big paintbrush. This is just an inexpensive paintbrush I purchased at Michael's. I used Altenew's Artists Watercolors and started layering the paper with pink and red paint, going light to dark. At first I paint horizontally but then I knew it'd be better to start painting in all different directions, but no plan. Like when you were in kindergarten and just painted a page because it made you feel like an artist. LOL.


I applied water liberally, just to keep the paint moving. I dried the paper in between layers, even picking up the paper to move the puddles around. The key is uneven application of paint. It will make the flower look more interesting. 

I just kept adding paint randomly, even adding some purple and blue to darken the bottom of the page. That's it. I made another page in purples, adding some pink and reds for variation.

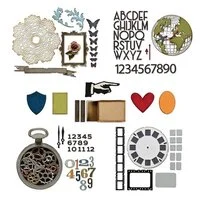
For the background, I used this from my stash:


I have another video on how I made this background. You can see it if you click here .

I embossed the sentiment in gold but if you look closely you can see I accidently got embossing powder where I didn't want it, so I couldn't use it. I ended up diecutting a circle from it to use on another card. I saved this scrap to diecut more from it but found I could cover up the circle and bad embossing with the flowers! Yay!


SUPPLIES: Click the links below to take you to where you can purchase. If you use my links to make a purchase, I receive a small commission from the store at no additional cost to you. It lets me and the store know you find my tutorials helpful. All supplies used for this card were purchased by me. Thank you!


----  http://shrsl.com/4htdq  [Altenew Store]
----  http://shrsl.com/4hte3  [Simon Says Stamp]


----  http://shrsl.com/4hte8  [Altenew Store]
----   http://shrsl.com/4htek  [Scrapbookcom]


I hope you find this as easy as I did, plus it's fun to mindlessly paint!

I can be found on Instagram @Susanbcards where I post several times a week.


Saturday, April 13, 2024

Lunar and Solar Pastes on Altenew's Farmhouse Florals YouTube Video


Today I'm sharing  Altenew's Farmhouse Florals Embossing Folder. I used my favorite technique, Solar and/or Lunar Pastes with Archival ink with this gorgeous folder. I've shared other cards where I randomly place Solar/Lunar Pastes on a panel and then emboss it with a 3D embossing folder. 

Here I wanted specific colors, in specific places, pink on the flowers and green on the background. So I ran through a piece of black cardstock 5.5"x5.5" square. I used my Sizzix Big Shot and the platform on 1, a silicon embossing pad, the 3D folder with paper and 1 top plate. It doesn't deeply emboss the image, just lightly so I can see where each color goes.

I used a palette knife to put some pink Lunar Paste on a foam blending tool. I like how flat the blender is, it makes it easier to apply the paste. I used Prom Queen, Love Struck and the new Neon Mood Ring. You definitely do NOT have to use 3 shades of pink, I just happened to have that many and like color variation. 

For the leaves and background, I used Crocodile Tears Solar Paste in a swirling motion.

After it is all completely dry, rub Black Archival Ink over the inside of the folder, just over the floral image. Line up the paper in the embossing folder and run it through the Big Shot again. This time I did it on #2, with the embossing folder and 1 top plate. The ink will transfer into the crevices.


Here is a YouTube video tutorial:


Sizzix Geo Crystals Embossing Folder
----  http://shrsl.com/4hmyh  [Scrapbookcom]
Bold Floral Dies
----  http://shrsl.com/4hmyi  [Scrapbookcom]


Altenew Whimsy Mofif Embossing Folder ---- https://shrsl.com/4e749 [Scrapbookcom] ---- http://shrsl.com/4e74a [Altenew]


Altenew Whimsy Mofif Embossing Folder ---- https://shrsl.com/4e749 [Scrapbookcom] ---- http://shrsl.com/4e74a [Altenew]


Sizzix Geo Crystals Embossing Folder
----  http://shrsl.com/4hmyh  [Scrapbookcom]

Impresslit Butterfly Discontinued


Spellbinders Spring Burst 3D Folder
----  http://shrsl.com/4hmy3  [Spellbinders] Exclusive

Spellbinders Bold Blooms ---- https://shrsl.com/49353 [Scrapbookcom] ---- https://shrsl.com/49359 [Spellbinders] Spellbinders Fluted Ovals ---- https://shrsl.com/4935c [Scrapbookcom] ---- https://shrsl.com/4935g [Spellbinders]


Spellbinders Autumn Splendor Embossing Folder
----  http://shrsl.com/4hmy7  [Scrapbookcom]
----  http://shrsl.com/4hmya  [Spellbinders]


Supplies with clickable links. Using these links are helpful to me, it lets companies and me know that you find my tutorials helpful, which will allow me to continue sharing techniques. If you make a purchase using my link, I receive a small commission at no additional cost to you.


Altenew Farmhouse Floral 3D Embossing Folder ---- http://shrsl.com/4hmve [Scrapbookcom] ---- http://shrsl.com/4hmvf [Altenew] ---- http://shrsl.com/4hmvg [SSS] Simon Hurley/Ranger Solar Pastes (I use Crocodile Tears0 ---- https://shrsl.com/4934k [Scrapbookcom] ---- http://shrsl.com/4hmvi [SSS] Simon Hurley/Ranger Lunar Pastes (I used Prom Queen, Love Struck, Mood Ring, Shooting Star) ---- http://shrsl.com/4hmvq [Scrapbookcom] ---- http://shrsl.com/4hmvs [SSS] Simon Hurley Ranger Neon Lunar Pastes ---- http://shrsl.com/4hmvt [Scrapbookcom] ---- http://shrsl.com/4hmvv [SSS] Scrapbookcom Blending Tool ---- https://shrsl.com/4934q [Scrapbookcom] ---- http://shrsl.com/4hmvk [SSS] Ranger Flat Foam Blender Refill ---- http://shrsl.com/4hmvm [Scrapbookcom] ---- http://shrsl.com/4hmvk [SSS] Ranger Archival Ink ---- https://shrsl.com/4934z [Scrapbookcom] ---- http://shrsl.com/4hmvn [SSS] Simon Hurley Ranger Paste Tools ---- http://shrsl.com/4hmvw [Scrapbookcom] ---- http://shrsl.com/4hmvx [SSS] Scrapbookcom Mixed Media Cardstock Pad ---- http://shrsl.com/4hmvy [Scrapbookcom]


Thursday, April 11, 2024

Spellbinders Sprigs Registration Press Plate and Dies


The Spellbinders Registration Press Plates are made so you can color images in different colors. In this case, the Sprigs Registration Press Plates are individual sprigs so each can be colored as you wish. My wish was to gold foil them with my Glimmer foiling system. I also inked some of the sprigs up but that is a different card to follow.

I diecut each of the sprigs and as usual, left them on my desk until inspiration struck or they were lost, whichever comes first. Luckily I had a leftover piece of pink ink blended cardstock that I had embossed. It was a strip 2" wide and 5.5" long. My diecuts ended up on it and I was reminded how good pink and gold look together. So I recreated it but used the new Leafy Helix embossing folder. This folder looks equally as good embossed or debossed. So I did one in pink and the card itself, flipped the embossing folder.

The pigment ink is from Altenew, I bought it years ago but it still was juicy enough. Such pretty shades of pink. I stamped the sentiment in the same ink. The sentiment is from Propagation Sentiments stamp set and dies.


Gold hot foiled and diecut. I cut 3 more layers from plain white so I could pop up the dies a bit.

SUPPLIES (with direct links to stores, using these links gives me a small commission, at no extra charge to you). 

----  http://shrsl.com/4hk26  [Spellbinders Store]
----  http://shrsl.com/4hk3a  [Scrapbookcom]


Leafy Helix Embossing Folder
----  http://shrsl.com/4hk29  [Spellbinders Store]
----  http://shrsl.com/4hk3d  [Scrapbookcom]


----  http://shrsl.com/4hk3n  [Spellbinderscom}
----  http://shrsl.com/4hk3h  [Scrapbookcom]


----  http://shrsl.com/4hk2e  [Spellbinders Store]
----  http://shrsl.com/4hk3g  [Scrapbookcom]


Red Cosmos Fresh Dye Ink (the ink I used was Altenew Pigment Ink which is discontinued, they only offer the same colors in their dye ink, which may be a bit harder to blend.)


----  http://shrsl.com/4hk2w  [Altenew Store]
----  http://shrsl.com/4hk30  [Scrapbookcom]


Thanks for looking! I can be found on Instagram @Susanbcards where I post several times a week.

Wednesday, April 10, 2024

Spellbinders Propagation Garden


Sometimes a collection comes along and I want it all. That is the case with Spellbinders Propagation Garden by Annie Williams

For the background, I ink blended from light to dark, using Distress Oxides. I have tried to blend with other inks but found that Distress Oxides are the easiest. They go on smoothly and transition beautifully. For the yellow background, I used Scattered Straw, Squeezed Lemonade and Mustard Seed. For the pink background, I used Spun Sugar, Kitsch Flamingo, Picked Raspberry, Lumberjack Plaid and a bit of Aged Mahogany. I then embossed it with "Leafy Helix" embossing folder. I embossed one with the raised side, the other with the recessed side so you can see the difference. Both look good.

I cut the containers from white cardstock and inked it with blue Distress Ink. I then diecut thin acetate to layer over the top to look like glass. The wood is real Cherry Wood paper from My Paper Insider.


SUPPLIES with links to the stores. If you use my link and make a purchase, I receive a very small commission at no additional cost to you. Thank you for your support, I hope my work inspires you.


----  http://shrsl.com/4hijz  [Spellbinders Store]
----  http://shrsl.com/4hild  [Scrapbookcom]


----  https://shrsl.com/4hfgw  [Your Paper Insider]


Thanks so much for looking! I can be found on Instagram @Susanbcards


Monday, April 8, 2024

Spellbinders March 2024 Stitching Die of the Month No Stitch Version


Last month I posted the stitched version of this dieset. It's from the March  Spellbinders 2024 Stitching Die of the Month Club. It's now availabe for individual purchase, you can find it HERE. You can just buy the die. Below is the stitched version. I believe it looks good both ways.

I imagined reading a cookbook, sitting at my kitchen table, drinking a cup of coffee, some of my favorite things to do. To keep it serene, I used pastel cardstock. I also have a Joy of Cooking cookbook that has the pages falling out, so I took a page out and attached it to my card.

The Cherry Wood paper for the background is so beautiful. It's very thin paper, real Cherry Wood, from Your Paper Insider. They send surprise assorted papers to subscribers 4x a year. But sometimes a paper is so special, people want it in a pack. This paper is available in a 10 pack, HERE.


You can click on the link or the image to go to Your Paper Insider and see more about this paper. I'd recommend looking at all the paper available for individual purchase, they are all pretty cool.


----  https://shrsl.com/4hfgw  [Your Paper Insider]


----  http://shrsl.com/4hfhu [Spellbinders Store exclusive]


That's it for today!

Thanks, Susan

Sunday, April 7, 2024

Mixed Media Backgrounds and Tim Holtz Vault 2


Tim Holtz released his 2nd Vault Release with Sizzix, this has 5 sets included. I used 2 sets on the cards I'm sharing today. They use "Vault Watch Gears" and "Vault World Traveler". The entire bundle of 5 can be purchased for a discounted price at both Scrapbookcom and Simon Says Stamp. Be sure to check the home page of these stores to see if there are any coupons, discounts or free gifts. 

As of this writing, SSS is offering $10 off a $74 purchase with the code TNBKS (valid until 4/7) great if you are purchasing the bundle! Scrapbookcom is offering 6% off any purchase or 11% off $100+ purchase (the bundle) use the code SAVINGS and a free gift.

Here is my YouTube Tutorial!


 .

For my first card, I used Altenew Watercolors on Distress Watercolor Paper. See my YouTube video for how I applied the paint in layers. I cut the watch body and the globe from inked paper, that I called eroded, based on Tim Holtz techniqure (he uses Distress Paints) I used Distress Sprays and Distress Resist (technique in my video). I then used Sizzix Creamy Acrylic paint to give the glove the metallic copper-look. I really enjoyed using this acrylic paint, I see using it more in the future. It comes in a variety of colors, check it out at Scrapbookcom or the Sizzix website. I didn't see it at SSS.

I keep a box of inked scraps in a shoebox. I have tags and backgrounds that I tried different techniques, maybe they aren't worthy of a card background but they come in handy for diecuts. I used my scraps for all the flowers and plants. I like the color variation, better than solid cardstock to me. The diesets I used for the plants and flowers are all Tim Holtz. They are: Vault Wildflowers, Funky Foliage (one of my faves). The sentiment is from Tiny Text. Everything is linked below, thanks for using my links.


For my second card, I used the eroded background I created in the video. I cut the watch in metallic gold cardstock and rubbed black acrylic paint on it. All the gears and numbers are included in the watch dieset from the Vault Watch and Gears. The watch face is covered with SSS acetate but you can use any acetate or even recycled packaging. The die wouldn't cut the acetate when run through my Big Shot but it left it embossed, so I used scissors to cut it out. I diecut the butterflies from the Vault Boutique set. The sentiment is from the Tiny Text stamp set. Everything is linked below.


My 3rd card is the first one I made. I just cut this quickly to see how all the pieces worked. I had all the cardstock in my shoebox, ready to go. The glitter cardstock is just silver glitter cardstock that I colored with Ranger alcohol ink. If you do this, please note the colors dry MUCH lighter than they initially look, so use darker shades. I used isopropyl alcohol to move the inks. You can buy 91% isopropyl alochol in the first aid aisle of many stores.


Supplies: Click on the direct links to the stores listed below. If I inspired you to try these techniques, using my links when making a purchase gives me a small commission, at no additional cost to you. This helps me continue to provide content, I very much appreciate it.


                             Tim Holtz Sizzix Vault 2 Bundle

----  http://shrsl.com/4hdy0  [Simon Says Stamp]
----  http://shrsl.com/4hdy2  [Scrapbookcom]


----  http://shrsl.com/4hdxr  [Scrapbookcom]
----  http://shrsl.com/4he5q  [SSS]

                                                    https://shrsl.com/4hdyp  [SSS}

http://shrsl.com/4hdyr  [Scrapbookcom]


----  http://shrsl.com/4hdy7  [Scrapbookcom]


----  http://shrsl.com/4hdy8  [Scrapbookcom]
----  http://shrsl.com/4hdy9  [SSS]


Distress Watercolor Paper (I buy 8.5 x 11" and cut it down)
----   http://shrsl.com/4hdzq  [Scrapbookcom]
----  http://shrsl.com/4hdzo  [SSS]


Distress Mixed Media Heavystock (I buy 8.5 x 11" and cut it)
----  http://shrsl.com/4hdzs  [Scrapbookcom]
----  http://shrsl.com/4hdzw  [SSS]

Distress Sprayer Water Mister 
----  http://shrsl.com/4he52  [Scrapbookcom]

Distress Oxide Sprays (Speckled Egg, Peeled Paint)
----  http://shrsl.com/4hdzz  [Scrapbookcom]
----  http://shrsl.com/4hdzy  [SSS]

Distress Spray Stains (Tarnished Brass, Faded Jeans, Peacock Feathers, Vintage Photo, Rusty Hinge, Black Soot, Peeled Paint)
----  http://shrsl.com/4he00 [Scrapbookcom] 
----  http://shrsl.com/4he01  [SSS]

Distress Mica Stain (Fallen Acorn)
----  https://shrsl.com/4he4q  [Scrapbookcom]
----  https://shrsl.com/4he4o  [SSS]

Ranger Alcohol Inks (use any blues)
---- http://shrsl.com/4he02  [Scrapbookcom]
----  http://shrsl.com/4he04  [SSS}

Altenew Artists Watercolor Pan
---- http://shrsl.com/4he06   [Scrapbookcom]

SSS acetate
----  http://shrsl.com/4he0c  [SSS]


Scrapbookcom Mint Tape (Excellent low tack tape)
----  http://shrsl.com/4he0d  [Scrapbookcom]


Thank you for looking!

I can also be  found on YouTube @Susanbcards 
and Instagram @Susanbcards


Saturday, April 6, 2024

Spellbinders April 2024 Stitching Die of the Month


Today I'm sharing how I made this card using the April Stitching Die of the Month. I just love this cute "Wall Hanging". You could also make a shaped card which would be so pretty.
This set is only available at Spellbinders from 4/6-4/27 at a lower price as part of a club subscription. The club can be canceled anytime by the 5th of the following month. If there are still sets available, they can be purchased on 5/10 at a slightly higher price, if still available. Spellbinders Club info can be found here.


Cut the largest oval from Neenah Solar White cardstock. This will be the base.


I used Distress Oxide Inks  in Tumbled Glass, Salvaged Patina, Chipped Sapphire and Black Soot.


The 3 oval dies put together will cut a frame. I cut this from kraft cardstock 3x and stacked them together. They need to be taped together to get the same cut so they stack evenly.


I diecut the small and large stitched flower dies 2x and glued them together, just for stability. This is optional but keeps them from bending or rips while stitching.


The lines for the stitching are embossed into the paper. I just did a straight stitch from the edge of the petal to the edge of the circle in the middle, all the way around.


The center of the flower is cut once from yellow cardstock, I decided to use clear small beads instead of stitching, but it can be done either way. I used 1 strand of yellow thread and a regular sewing needle, the hole of the bead needs to pass over the eye of the needle. The beads are around the outer edge of the circle. With the needle, come up through a hole, attach a bead and go through the same hole. The bead will stay in place. Repeat all the way around.


For the center of the circle, I used a sequin with a hole in the center. I pulled the needle up throught the center, slid the sequin and another clear bead onto the needle, then put the needle back through the center of the seqin, it will stay in place. Knot in the back.


Pick up the stitched flower and pull the needle through the top of the center of the flower, attaching the beaded piece. Knot the thread on the back of the flower, put a dot of glue there. 


Here's a closeup of the completed flowers.


For the stitched leaves, I used a straight stitch. Again the lines where the stitching goes are embossed onto the paper.

All the rest of the pieces are regular diecuts. I attached the frame to the inked oval. I arranged my diecuts and glued them to the base. I used a few pop dots to raise my stitched flowers up.

I took a white A2 card and embossed the front, attached the framed piece.


That's it for today! Lised below are the supplies used with links to the products. Using these links help me to provide this content, so thank you for using them.


Supplies:

Spellbinders Stitching Die of the Month (available from 4/6-4/27 at the club price (cancel at any time) available on 5/10 as a single purchase but at a higher price.)
http://shrsl.com/4hd8q  [Spellbinders Store]


Stitching Accessories (thread, needles)
http://shrsl.com/4hd8y [Spellbinders Store]

Neenah Solar White Cardstock
http://shrsl.com/4hd91  [Scrapbookcom Store]

http://shrsl.com/4hd94  [Spellbinders Store]


Distress Oxide Inks
http://shrsl.com/4hd96  [Spellbinders Store]

Artis Glue
http://shrsl.com/4hd98  [Scrapbookcom Store]