Sunday, March 31, 2024

Altenew Farmhouse Florals Embossing Folder

 Probably my favorite technique for 3D embossing folders is to emboss Solar and/or Lunar Pastes.

I used black 110 lb cardstock, lightly embossed the image. By that, I mean I ran it through my Big Shot but with barely enough pressure to leave a light impression. I did this so I could see where I wanted the pink shades of Lunar Paste. I used a flat foam blending tool to apply the pastes, as always.

You can see it’s not exact, I wanted some of the pink to blend in with some of the Crocodile Tears Solar Paste. I really like the shade of green here. Solar Paste is iridescent on white paper but really shines on black paper. 

I let the paste thoroughly dry and then rubbed black Archival Ink over the embossing folder and ran the paper through the Big Shot. The black ink is pushed into the recessed areas. I then took a bit of yellow Lunar Paste and with my finger applied the paste to a few areas as seen above.


                                                SUPPLIES;


----  http://shrsl.com/4hhcu  [Scrapbookcom]


Simon Hurley/Ranger Solar Pastes (Crocodile Tears) ---- https://shrsl.com/4934k [Scrapbookcom]
---- http://shrsl.com/4hhd3 [Spellbinders]

Simon Hurley/Ranger Lunar Pastes (Prom Queen, Mood Ring, Rosy Cheeks)
---- http://shrsl.com/4hhcz [Scrapbookcom]
---- http://shrsl.com/4fhkx [Spellbinders]

Ranger Ink Blending Foam ---- https://shrsl.com/49tqs [Scrapbookcom]

Scrapbookcom Blending Tool ---- https://shrsl.com/4934q [Scrapbookcom]


Thanks for looking! I post several times a week on Instagram @Susanbcards


Wednesday, March 27, 2024

Mr Rabbit Stamp by Tim Holtz Billboard


I just received this Tim Holtz Mr Rabbit stamp set from Scrapbookcom and had to try it out. I stamped the rabbit on Distress Mixed Media Heavystock (cut to 5x7) in black Archival ink, clear embossed it so I wouldn't have to worry about smearing. I decided to use Distress Crayons in Vintage Photo and Tattered Rose for the Rabbit, for his clothes I used Spiced Marmalade, Speckled Egg and Twisted Citron. I used a damp paper towel to moisten my finger so I could move the crayon on the paper. 

I stamped all the words in tropical colors from a mini Archival Ink set. I really had no idea where I was going with this but it looked like a billboard, so I framed it with the Sizzix Lumber embossing  folder and inked to look like aged wood. I wanted it to look like a roadside billboard, cut off at one end, so I only framed the image on 3 sides. I splattered the billboard with Distress Oxide Sprays in Spun Sugar, Speckled Egg, Old Paper, Peeled Paint and a bit of Gathered Twigs.

I then diecut the Sizzix "Hippity Hop" bunny and "Flower Field" in black so it appears the billboard is lit up and the bunny is in silhouette. I diecut the bunny from black fun foam 2x so he would stand out from the billboard.

Pretty fun!

Listed are the Supplies I used, thanks for looking!

SUPPLIES click on the links to see more:


http://shrsl.com/4gy4n  [Scrapbookcom]

http://shrsl.com/4gy6v  [Scrapbookcom]


http://shrsl.com/4gy71  [Scrapbookcom]


http://shrsl.com/4gy53  [Scrapbookcom]


http://shrsl.com/4gy5h  [Scrapbookcom]


http://shrsl.com/4gy63  [Scrapbookcom]

http://shrsl.com/4gy68  [Scrapbookcom]


https://shrsl.com/4gy6m  [Scrapbookcom]

Always be sure to check out the Scrapbookcom Coupon Section when ordering, many times there are free gifts and/or discounts!


Products can also be found at Simon Says Stamp:


Sunday, March 24, 2024

3 Different Looks from the Luxe Backdrop & Border 3D Emboss & Cut Folder


1 minute Short on YouTube:


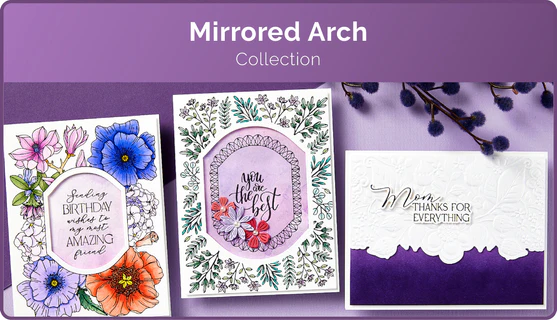
This first card uses the Luxe Backdrop Emboss and Cut Folder from the Spellbinders Mirrored Arch Collection. It's 2 pieces, a 3D embossing folder and a decorative cutting edge die. I inked the inside of the embossing folder with Vintage Photo Archival Ink, only on the floral image. I then used the edge die to cut the bottom of the card front. I lined the card with the pink cardstock on the top front of the card and the bottom inside of the card. I watercolored the image with Altenew Artists' Watercolors (pan set).


For the second card, I used copper colored metallic cardstock I purchased at Michaels, (last year). I put the A2 sized cardstock in the embossing folder horizontally, so I would only get the top portion of the folder, none of the floral embossed area. The copper paper looked too shiny, so I used an old Tim Holtz technique where you rub black acrylic paint over the panel to give it an aged look.

The Bold Blooms are diecut from some cardstock that I had put some Solar Pastes on with a flat foam blending tool.


My final card uses both images on this embossing folder, I placed a piece of ivory cardstock, lightly misted, into the folder. I added the decorative edger, it fits into the embossing folder. I used a silicone mat with my Big Shot to emboss the entire thing. This is an elegant card, nothing else was added.


SUPPLIES with affiliate links at no additional charge to you:

See the entire Mirrored Arch Collection:

https://shrsl.com/4gtnf  [Spellbinders Store]
http://shrsl.com/4gtnm  [Scrapbookcom]
http://shrsl.com/4gtnq  [Simon Says Stamp]

http://shrsl.com/4gt17  [Spellbinders Store]
http://shrsl.com/4gt2y  [Scrapbookcom]
http://shrsl.com/4gtn2  [Simon Says Stamp]

http://shrsl.com/4gmj8  [Spellbinders Store]
http://shrsl.com/4gtnb  [Scrapbookcom]
http://shrsl.com/4gtn5   [Simon Says Stamp]


https://shrsl.com/4934k [Scrapbookcom] https://shrsl.com/49tqf [Spellbinders]
https://shrsl.com/4gtnt [Simon Says Stamp]


Thank you for looking. I post several times a week on 

YouTube:  http://www.youtube.com/@susanbcards


Spellbinders Let's Celebrate Press Plates by Yana Smakula


My first card is a BetterPress plate called "Celebrate Flowers Registration Press Plate". A registration press plate has seperate press pieces so they can easily be inked in different colors. In this set, the word Celebrate is one plate, the flowers are on a second plate. There's an acetate "map" that can be placed on the BetterPress so you can properly line up the pieces. Very easy. I used Archival Inks in tropical colors, listed in the supplies below.


My second card used the "Floral Celebration" and Let's Celebrate Sentiments press plates. I could have foiled these press plates but I like the colors of the ink, so I carefull ran the colors over the press plate, letting them mix a bit. The sentiment is pressed in black BetterPress Ink. The diecuts are from my favorite set, Bold Blooms. I use that one quite a bit.

That's all for today, supplies are linked below. Using these links help me out, if you so desire.

SUPPLIES:


http://shrsl.com/4gb9k  (Spellbinders Store)
http://shrsl.com/4gbar  (Scrapbookcom)
http://shrsl.com/4gbat  (Simon Says Stamp)


http://shrsl.com/4gtlz  [Spellbinders Store]


Products can be found at Scrapbookcom and at Simon Says Stamp, click the photos below.


Saturday, March 23, 2024

Let's Celebrate Wax Seals and Using Something New!


I had this Peony Background panel from my long session (YouTube video) using this plate on different substrates. This one is black hot foil on glossy cardstock. I found that slick substrates grab the foil easily. Acetate, coated cardstock and glossy cardstock to name a few. Coloring with Copics isn't very easy as the ink sits on top of the paper, rather than soaking in but I thought it made an interesting effect. 

I received my first Spellbinders Wax Seal. This one is Let's Celebrate from the Let's Celebrate Collection by Yana Smakula. (You can see the entire collection here). I have used wax seals in the past, I once taught a PaperSource class on cardmaking and I had to demonstrate wax seals. They had the wax sticks you hold like a candle and they also had the wax sticks you could put in a heat gun. I chose the heat gun because less chance of starting a fire in a place called PaperSource, you know, full of paper, lol.

This time I used the Wax Seal starter kit, I found this to be much easier. You put the wax beads in a small pot and heat it over a tea light. Surprisingly fast. It only took 4 beads to make a seal. Bonus, you can break up any imprefect seals and remelt them in the pot. You can't do that with the glue gun wax or the wax sticks. Here's a closeup of my seal. You can also color in any areas of the seal you'd like but I decided to leave it as is. It makes a nice dimensional sentiment. You could also use this for a wedding invitation or save the date.


SUPPLY LIST with affiliate links, clicking on these links will take you directly to where you can purchase the products. Using these links let the companies (and me) know you find my information helpful.

Spellbinders Let's Celebrate Collection

http://shrsl.com/4gb9k  (Spellbinders Store)
http://shrsl.com/4gspd  [Scrapbookcom]


Thank you for looking!

Susan

Friday, March 22, 2024

Spellbinders "Everyday Foliage" by Simon Hurley from the Tulip Garden Collection


Whenever I put a bouquet on a black background with spatters, I think, "Lost in Space"! But you really can't beat bright colors against black.

Here I used Spellbinders "Everyday Foliage" by Simon Hurley from the Tulip Garden Collection. I diecut each of the pieces 2x from Distress Watercolor paper because I knew I was going to use watercolors. I feel like watercolors are easier to use than Copics for coloring diecuts. I just put the diecutss on my glass mat and using my paintbrush put some water on them. Then I use the lightest shade of whichever color I'm using and cover the entire die. I dry it and then put more water on the diecut about 3/4 of the way up the petals (or leaves) and add a bit of the darker shade, pulling it up the petal. I let it dry completely and then splatter the diecuts with a darker shade of whatever color I'm using.

I diecut the Hello sentiment from copper metallic cardstock and the shadow was cut from vellum. I adhered everything to the black cardstock and spattered it with watered down white acrylic paint. I matted it on the same copper cardstock and adhered it all to an A2 card. Supplies are listed below with direct links to where they can be found. If you find my content inspiring, using my links help me out at no additional cost to you. Thanks so much.


SUPPLIES:

Spellbinders "Tulip Garden" Collection by Simon Hurley
To see the entire collection, Click Here.


Spellbinders "Everyday Foliage" dieset

----  http://shrsl.com/4greq  [Spellbinders Store]
----  http://shrsl.com/4grfw  [Scrapbookcom]

Spellbinders "Handwritten Sentiments"

----  http://shrsl.com/4grey  [Spellbinders Store]
---- http://shrsl.com/4grg3   [Scrapbookcom]


Distress Watercolor Cardstock

----  http://shrsl.com/4grfo  [Scrapbookcom]


Altenew Artists' Watercolor Pan Set
----  http://shrsl.com/4grge  [Scrapbookcom]
----  http://shrsl.com/4grgq  [Altenew Store]


These are my favorite places to shop, click on the photo to take you there!


I post several times a week on Instagram @Susanbcards