Monday, July 29, 2024

Spellbinders Peacock Paradise!


It took me a bit of time to figure out what I wanted to make with the Spellbinders "Peacock Paradise" Collection. It's a lovely collection, you can see the entire collection by clicking HERE.

I wanted to use alcohol ink and have some lovely swirls on the feathers but Yupo paper and dies don't work together well. It's hard to cut plastic and the feathers have small cutout that just wouldn't work.

So this set has been sitting on my desk for weeks, just taunting me. It wouldn't do it justice to just cut the feathers out of plain blue cardstock. I looked through my specialty papers and saw this "Rainbow Gradient" cardstock from Your Paper Insider. You can buy a 10 pack of this paper, the price listed includes shipping, which is great. 

I used it before on my blog HERE. It's really beautiful. 


I diecut the "Glorius Peacock" from black cardstock and the shadow from the Rainbow Gradient cardstock. I used the same cardstock for the 5x7 background and embossed it with Spellbinders "Flourish" 3D embossing folder. (this folder is from the Birthday Bash Collection, I didn't receive the folders from the Peacock Paradise Collection, but you can see those HERE).

After I embossed it, it curled a bit. I glued it to the front of the card and put a book on top of it and it laid flat again. For the entire card, I used a full sheet of this beautiful paper.

I diecut the "Cameo Frames" from gold metallic cardstock, a scrap from my stash, I think it was originally from Michaels. I diecut the frame 2 additional times from kraft cardstock, just to give it some sturdiness. This metallicc paper was thin and I didn't want it to look bumpy on the background, not to mention that I like dimension.

I used a piece of fun foam and popped up the shadow of the peacock. You can diecut the foam with the shadow die, but I just used a scissors and cut a rough shape to save some foam.

I added a few gem stickers to the peacock's head. I'm pretty happy with how it turned out, so regal. It really didn't take much time to put this card together since there was no inking or coloring involved. Ok, let's not count the weeks I thought about how to make it.

Below are the supplies I used with clickable links, thank you for using them, it helps me out immensely.

The entire "Peacock Paradise Collection" can be found by clicking HERE


----  http://shrsl.com/4hyaz  [Your Paper Insider]


----  https://tinyurl.com/ms52fwan  [Spellbinders]
----  http://shrsl.com/4mho4  [Scrapbookcom]
----  http://shrsl.com/4mho6  [Simon Says Stamp]


---- https://tinyurl.com/yc5bc93k   [Spellbinders]
----  http://shrsl.com/4mhn4  [Scrapbookcom]
----  http://shrsl.com/4mhns  [Simon Says Stamp]


====  https://tinyurl.com/4nj8zw7k  {Spellbinders]
----  http://shrsl.com/4mhnm  [Scrapbookcom]
----  http://shrsl.com/4mho1  [Simon Says Stamp]


Thank you for looking!
 I can be found on Instagram @Susanbcards


Thursday, July 25, 2024

A Magic Slider Card Using Simon Says Stamp's Just Write!


Well, there's not much harder than taking a photo of a magic slider card, except maybe take a photo of shine. The card above isn't a slider card, it's a regular card. I stamped the pencil stamp on a piece of Distress Heavystock paper, heat embossed it and then sprayed Distress Spray Stains on the paper. I spritzed it with water and they blended together. After it was dry, I used a black alcohol ink marker and colored the negative space in so the pencils would stand out.

If you want a tutorial of how I made the slider card, I'll leave it to the experts. https://youtu.be/tGlEE1xpvmw?si=UIZSHDA6triKYiLM for Jennifer McGuire's video, which I followed.

I received the SSS "Just Write" stamp set from their new release called, "Cheering for You". You can see the entire release HERE.

I stamped the "Just Write" stamp onto acetate cut to fit the stamp. I used Stazon Ink on the acetate rather than heat embossing the image like Jennifer did, because it's so much easier to do. I have a very thick heat resistant acetate from Simon Says Stamp but I wanted this card to be a bit easier to put together. Trying to get the embossing powder off the acetate takes longer than I care to do. I did heat emboss the paper underneath.

I thought it'd be fun to use yellow paper to mimic #2 pencils. Underneath is the colored panel which is Distress Spray Stains in yellow, blue and fuchsia. When sprayed together, it makes a nice blend.

I followed Jennifer McGuire's instructions on how to make the slider card, so I'm not going to go over that part but I have a quick video below that shows how I made it. Keep in mind you can make your card any size you want, with any image you want. Just cut a frame with a cutout the size of the image you want to show. The border around the frame is 1/2" so the cardstock strips under the frame are cut just a smidge less than 1/2" to hide them under the frame.


VIDEO 


SUPPLIES:


----  http://shrsl.com/4mc3b  [Simon Says Stamp]


----  http://shrsl.com/4mc3g  [Simon Says Stamp]


----  http://shrsl.com/4mc3l  [Simon Says Stamp]

I used Picked Raspberry, Squeezed Lemonade and Peaccock Feathers
----  http://shrsl.com/4mc3r  [Simon Says Stamp]

That's it, thank you to those who have used my links. It helps me know if my tutorials are helpful or not.


Wednesday, July 24, 2024

Fun Inking on a Halloween Card!


I received this Scrapbookcom "Trick or Treat" matching stamp and die set. I decided to try some fun inking techniques, quite simply done.

I used black Archival Ink for the cauldron and clear heat embossed it. The stamp didn't ink completely but I liked the way it looked with some white showing. I then colored it in using Copic G14 Apple Green. and added a few green gem stickers from my stash (OLD).

I put the Trick or Treat sentiment stamp onto my Misti and using Spiced Marmalade and Mustard Seed mini Distress Ink pads, I pulled the small pads across the stamps to get the candy corn effect.

I used the matching dies to cut out the stamped pieces. I like when there's a die for sentiments, it gives it a nice finished look. I diecut the pieces 2x and glued them together to give it some dimension.

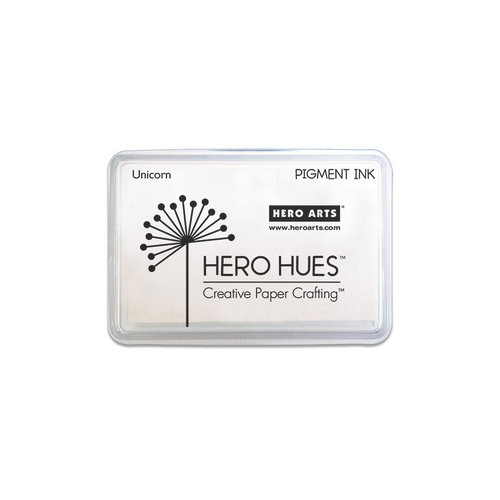
I wanted to make a smoky effect, so I took my Hero Arts "Unicorn" ink pad and swirled it onto the paper, making small 'S' shapes and backward 'S' shapes. The foam ink pad is perfect for this. Vary the pressure, some very lightly to look like fading smoke.

I matted the panel onto an orange mat, and then a yellow cardfront. That's it!

----  http://shrsl.com/4mbfq  [Scrapbookcom]

----  http://shrsl.com/4mbfw  [Scrapbookcom]


----  http://shrsl.com/4mbg2  [Scrapbookcom]


Sunday, July 21, 2024

Spellbinders "Bibi's Cats and Pugs" Collection


This bicycle called, "Big Bicycle" is a big bicycle. LOL. To give you size reference, the purple mat is 5x7. You can cut off the back end of the bicycle and just have the front of the bicycle show with the basket of goodies. The dies for all the fun accessories are included in this set. I added the "Party Puggles" dog to the back. If you click on the links listed below under SUPPLIES, you can see what each set includes. There's also a full card front pug and cat, I didn't get those, I'm kinda sorry I didn't now that I've seen all the cute card samples.

There's not much to explain about putting this card together, it's all die cuts but it is so cute, isn't it?

Supplies with clickable links are listed below. Using my link to make any purchase, supports me, I greatly appreciate the people who have done so.

SUPPLIES:

Here's what I used from Bibi's Cats and Pugs Collection. I linked the entire collection, so you can see it all, it's pretty cute:


Spellbinders Store  https://tinyurl.com/3ej3wycj

Scrapbookcom  http://shrsl.com/4m66j

Simon Says Stamp  http://shrsl.com/4m66g


                                            Big Bicycle

-----  https://tinyurl.com/mr2d6z3p  [Spellbinders]

Party Puggles

----  https://tinyurl.com/mv952rzm  [Spellbinders]

Cats and Pugs Sentiment Stamps
----  https://tinyurl.com/2fut9stx  [Spellbinders]

Click on the stores below:


Thank you for looking! I can be found on Instagram @Susanbcards


Sunday, July 14, 2024

How to Shape the Spellbinders Landscape Rose


One of my favorite designers for Spellbinders is Susan Tierney-Cockburn. Her floral dies are so beautiful especially when used with a shaping kit. Once you learn how to give flowers dimension, you can use this technique on any floral diecut.

I know you can't mail this card in a regular envelope, it would have to go in a box. You could also use this bouquet as a topper on a gift box, wouldn't that be beautiful? Or on a tag on a gift, or how about one floral on a place card for a shower or wedding?

In my video, I show how I colored the petals with a blending brush and Distress Oxide inks. You could also skip the lightest color of ink and start with a piece of light colored cardstock instead.

I diecut the pieces from a piece of A2 size cardstock, everything can be cut from this one piece, but if you want more leaves you may need to use another piece of cardstock. I used white cardstock to cut everything. For shaping flowers, I like to use 80 lb cardstock.

Here's the first card I made. The pink flowers are Distress Oxides in Spun Sugar, Kitsch Flamingo and Picked Raspberry. The peach flower is in Salt Water Taffy and tipped with Ripe Persimmon. The purple flower is Seedless Preserves and Villianous Potion. The leaves are Distress Oxides in Mowed Lawn, Cracked Pistacio and Rustic Wilderness. The stamen is Squeezed Lemonade and Fossilized Amber and tipped with Ripe Persimmon.

I learned how to shape the flowers watching Susan Tierney-Cockburn's tutorials. You can check them out on the Spellbinders channel, she has one for each dieset. I don't have Susan's tools, so I just used the Sizzix Shaping Tools, mostly the same techniques. You can see my video here:


This card has a bit of Distress Spritz in Peeled Paint for the leaves, Picked Raspberry on the pink flowers and Fossilized Amber on the peach flower.

I cut a piece of white cardstock in half, 5.5" x 8.5". I put it in the Nature's Botanical Wreath embossing folder from this collection. I white heat embossed the sentiment on a piece of black scrap. 

I cut a black mat at 5x7" and cut the white embossed cardstock to fit on it, 4 3/4" x 6 3/4". I then mounted all the flowers and leaves in the center of the panel.

Supplies are listed below with affiliate links, at no additional charge to you. Thanks for visiting. I post several times a week on Instagram @Susanbcards

To see the entire Spellbinders Nature's Botanical Garden Collection by Susan Tierney-Cockburn:

----  http://shrsl.com/4lugd  [Spellbinders]

----  http://shrsl.com/4lugl  [Simon Says Stamp] (SSS)

----  http://shrsl.com/4luh6  [Scrapbookcom]


----  http://shrsl.com/4lwla  [Spellbinders]
----  http://shrsl.com/4lwld  [Scrapbookcom]
----  http://shrsl.com/4lwlh  [Simon Says Stamp]

----  http://shrsl.com/4lwmg  [Spellbinders]
----  http://shrsl.com/4lwmm  [Scrapbookcom]
----  http://shrsl.com/4lwmo  [Simon Says Stamp]

----  http://shrsl.com/4lwmu  [Spellbinders]
----  http://shrsl.com/4lwms  [Scrapbookcom]
----  http://shrsl.com/4lwmv  [Simon Says Stamp]


----  http://shrsl.com/4luiw  [Scrapbookcom]
----  https://tinyurl.com/5bns6vab  [Spellbinders]
----  http://shrsl.com/4lujb  [SSS]

----  http://shrsl.com/4lujo  [Scrapbookcom]
----  http://shrsl.com/4luk1  [SSS]


----  http://shrsl.com/4lfuf  [Scrapbookcom]
----  http://shrsl.com/4lfuq  [Simon Says Stamp]


Saturday, July 13, 2024

Spellbinders Faux Pumpkin from Nichol's Needlework Collection


Here's another card using Spellbinders "Nichol's Needlework Collection" check out my blog post HERE if you want to see more cards I made using this sweet collection.

I used this gorgeous dark green cardstock for the background. Spellbinders has such beautiful cardstock called Color Essentials. The super dark cardstock sells out especially around holiday cardmaking time, so be sure to get it before it sells out. I have Forest, Indigo, Plum, Mahogany and Crimson. All the best colors for Fall to Christmas.

The embroidery hoop die is 1die that cuts out the "fabric" and the "wooden hoop". I cut it from white cardstock and then colored the wood using Dark Espresso and Walnut Stain Distress Ink. The wood part is cut 3 times, the fabric just once to give the hoop dimension. 

The sentiment is from the same collection, I gold heat embossed it with Brutus Monroe's Gilded embossing powder. If you haven't tried it, you should. It's the best, so finely ground it gets all the details.

Everything else is diecut from scraps of paper in my stash.

That's it for today, Links to the products are listed below!


Below are the photos of each set, I'm just going to link the entire collection at Spellbinders and SSS since I really think it's worth looking at the whole thing together. Scrapbookcom didn't group the collection together on their site, so I'll just link each set.

Nichols Needlework Collection at SpellbindersStore:

Nichols Needlework Collection at Simon Says Stamp:


                                            Gathering Stitches Dieset


-----  http://shrsl.com/4lqxf  [Scrapbookcom]


                                                Faux Embroidered Pumpkin

----  http://shrsl.com/4lqx6  [Scrapbookcom]

                                            Needleworker Tool Set

----  http://shrsl.com/4lqwx  [Scrapbookcom]


----  http://shrsl.com/4lqwt  [Scrapbookcom]

Spellbinders Color Essentials Cardstock 
(I used Forest)


----  https://tinyurl.com/43xm5v4t  [Spellbinders]
----  http://shrsl.com/4lvp4  [Scrapbookcom]


Faux Embroidered Stockings


----  http://shrsl.com/4lqwj  [Scrapbookcom]


----  http://shrsl.com/4lqw7  [Scrapbookcom]

Click on the images below to go to these stores:


Thank you for visiting!