Thursday, February 13, 2020

Valentine Treat Mailboxes

"Stamping With Amore" on Youtube has some great tutorials. This treat box is from her tutorial called "Valentine Mailbox Treatbox" Hers is a little smaller, I figured out the measurements to make a slightly larger box so I could put a few cookies in the box, her version is about an inch wide which could fit a few small candies. You really need 110 lb cardstock to make the legs sturdy enough to hold up or you will need to reinforce the legs. I only had white 110 lb, but decorating with pink paper brightened it up.

You will need:
1 piece of 5.5"x 7.5" white cardstock
2 pieces of 3"x 5" white 110 lb cardstock
3 1/4" circle die
1 5/8" x 2 7/8" rectangle (or whatever size you want to cut the legs or cut by hand
Assorted patterned paper and diecuts or stickers to decorate your box
Corner punch to cut the patterned paper if you want
On the 7.5" side, score at 3" and 4.5". Turn cardstock.
On the 5.5" side score at 1.5" and 4"


Using a bone folder fold all score lines. Cut tabs as shown, cutting a small triangle out of the middle tabs. Place glue on the right rectangle and on the back of the middle tabs. Pull up the middle tabs, attach to the left tabs, then place the right glued tabs on the outside to form a box.
Place the circle on the 2 rectangle pieces to form the curve of the mailbox, doing a partial diecut. The top cutting plate will only cut where it covers the circle die.


Using the rectangle die, cut the legs.

Place glue on one side of the box and attach the curved pieces on both sides, stand it up after attaching the first side to be sure the 2nd side is lined up properly so it doesn't tip.

Decorate as desired:


Tuesday, February 4, 2020

Celebrate!

Sometimes you make a background and things don't work out the way you imagined. But art supplies are expensive, especially when you are talking about Yupo paper and alcohol ink. I watched a video showing how to make wispy alcohol backgrounds with a hairdryer. It worked pretty well until I tried using the Pearl Alcohol inks, they don't seem to move on the paper as well as the regular alcohol inks.
Not a very pretty background, it looks like a pink and purple spider monster. LOL. So I decided the best thing to do with it was to die cut it, making the pieces smaller. I used Simon Says Stamp! "Curly Streamers" dies and cut several pieces.

I then used Picked Raspberry and Wilted Violet Distress Oxide Inks and the Scrapbook.com Ink Blending Tool with Domed Foam Applicators. These blending tools are great, no hard edges and very smooth. I then decided I wanted the background to look like confetti was thrown in the air with the streamers, so I used a spray bottle and sprayed water drops on the paper, and dabbed it with a towel.

I cut the MFT "Celebrate" out of purple glitter fun foam which I bought on clearance at Target a few months ago. An easy way to get a popped up sparkly sentiment. I cut the streamer die cuts into different lengths and placed them on my card. That's it!


Saturday, January 18, 2020

Hero Arts Tie Dye Love card


I took an alcohol ink background that I wasn't very happy with and decided to try Martha Stewart Glitter Paste on it. I love the look of glitter paste and always wanted to try it. I took a Hero Arts stencil I had and washi taped it over the yupo paper background and with a palette knife I put some of the glitter paste on the stencil. It took a while to dry but I like the results. It had a hippie vibe, a cool artsy pattern over a tie dye look background. So what other sentiment would work but "LOVE"? Cuz that's all you need....sentiment die by Hero Arts.


This month's A Blog named Hero's challenge is "Anything Goes", perfect for me to enter this!

Tuesday, January 14, 2020

Rust it Up Challenge

This week's Simon Says Stamp challenge is Rust It Up! Well, I'm up for a good challenge. I made some Christmas cards where I ran red foil paper through an embossing folder and then ran a gold ink pad over it. This made an unbelievably beautiful effect. If you are interested in seeing it, look at my blog from 12/09/19. So I decided to do something similar here, I took a piece of black cardstock, ran the Tim Holtz/Sizzix gears folder over it, then took a gold metallic ink pad and ran it over the raised parts...perfection. I added the gears and the wordband using Distress Collage Medium which is the strong adhesive. 
Here I'm trying to decide if I should add the butterfly...still not sure.

Here's what I used. I painted on some of the Finnabair Patina effect pastes onto the black cardstock.


Friday, January 10, 2020

Mailbox full of LOVE!


A piece of cardstock 3.5" x 10.5". Score on the long side at 2.5", 5", 7.5" and 10"
I used a rectangle die to create feet, you can use any square or rectangle that fits or even cut freehand.
Here I glued the small tab (the 10" scoreline) inside to create a box. Here you can see the feet as well.
I forgot to take a pic of the 2 circles I cut out of the same cardstock. The circle is a 2 3/8 inch circle that fits on the side of the box. I glued them 1/2 way down to create the curve of the mailbox. 
Here you can see how I glued the 2 circles on the side and attached the tabs.
Here are the 2 tabs, 3.5" x 3/4", scored on the long side at 1/2" and 3", fold and glue inside mailbox.
I started decorating the box with patterned paper cut slightly smaller than the sides of the mailbox to decorate. I also created a small faux "door" using the metallic paper and a small rectangle handle in black. I die cut hearts and envelopes and glued them to clear plastic and then glued to the tabs so the box would look like it was so full it was popping out of the top. Just be sure the pieces are short enough to fit into the envelope when folded, unless you aren't using an envelope. I also diecut the word "love" to attach to the front.

Thank you for looking!

Monday, December 9, 2019

Red and gold metallic Season's Greetings card

I took red metallic cardstock from Michael's and embossed it with the Sizzix Tim Holtz Botanical embossing folder. This is a gorgeous folder that gives a pronounced image. I then took a gold ink pad and ran it over the raised parts. I didn't think of doing this until I started playing with some gold die cuts, it really made the image pop.


Here is what the cardstock looked like before running the gold ink over it. It is also very pretty, here with a silver sentiment.
Red metallic cardstock from Recollections at Michael's. Gold Pigment ink by Color Box. Season's Greetings sentiment die by Pinkfresh Studio. Gold metallic paper from Recollections.

Thursday, December 5, 2019

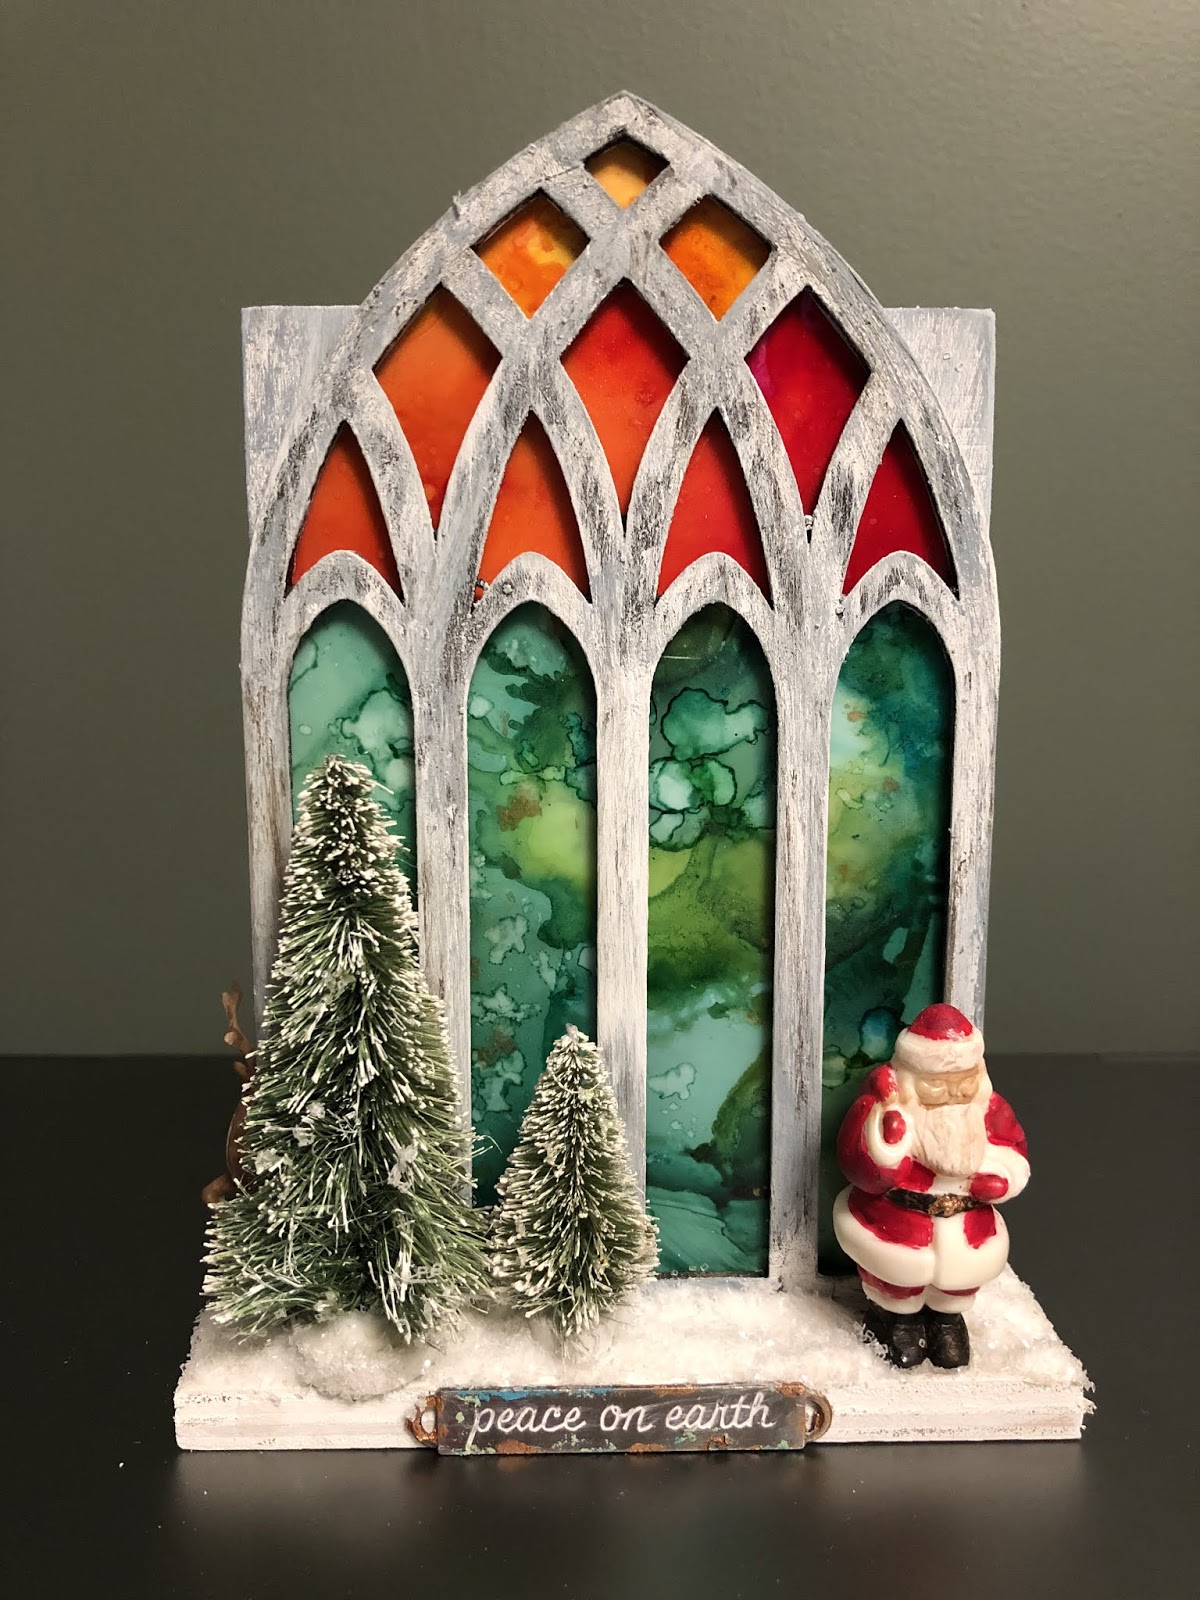
Cathedral Arch

I bought the Tim Holtz Etcetera Cathedral Windows, the Idea-ology Christmas word bands, the resin Santa and decorative deer, with no real plan. I also bought this $1 frame, it's really just a piece of wood with a bottom. I was originally thinking about putting a Christmas cookie recipe on it and decorating it but the bottom of the frame was perfect as a ledge.

I first painted the Cathedral window brown and decided to use some scraps of alcohol ink on yupo I had left over but it looked too dark. So I took some white and grey acrylic pant and just quickly painted over the brown. It gave it a rustic, shabby chic look.
Here's the brown window with the snowman and 2 trees. I'm saving the snowman for another project..

I painted the resin Santa with a small brush and acrylic paint. I wiped a little brown alcohol ink over his face to hightlight his features. I saw this idea on stickydots blog. I used white acrylic paint to hightlight the peace on earth wordbank and aged it with some patina paints. The trees I bought as is at Michaels but I cut off the back of the tree so it would sit better. Everything is glued in place with Collage Medium including a little glitter on the ground. That's about it, maybe it needs the little tree?

Tuesday, November 26, 2019

Card and Gift Card Box in 1

This is a Box/Card I found on YouTube by MayMay Made It Crafts. Her box is a small square, while cute, I wanted one to fit a gift card and some Hershey Nuggets. So I changed the dimensions. See her video tutorial, it's great.
For the Card/Box:
(1) 3 3/4" x 12" solid green cardstock. Score at 3", 4 1/4", 7 1/4", 8 1/2" and 11 1/2".
(2) 2 3/4" x 3 1/2" solid white cardstock (for outside matt and inside the card)
(1) 2 1/2" x 3 1/4" patterned paper (for outside card, you can cut another one for inside card but I wanted a space to write a message.
(2) 3 1/2" x 1" white cardstock for side matt
(2) 3 1/4" x 3/4" patterned paper for side, glue onto the white.

For the gift card drawer:
(1) 5 1/4" x 6" white HEAVY cardstock. Score at 1 1/8" on all 4 sides
(2) 7/8" x 2 3/4" patterned paper for front and back of drawer (no matt needed)

1 piece of ribbon, 5" maybe a little less

Optional piece is the "All is Calm" print to decorate the front of the card. You can leave it off or stamp whatever you want.
Here I glued all the matts and printed paper. I stamped the sentiment on the white cardstock which when put together will be on the inside of the card. The cover of the card is the far right piece which I will pop up the All is Calm piece.
Here you can see how the box is folded and where the red tape is attached to create a box and card.
This is the white 5 1/4" x 6" piece of cardstock scored and burnished on all 4 sides. Here you can see where I cut up to the horizontal score lines on 2 opposite sides. I took a small notch out of the square piece so when the box is glued together there is no overhang. I also glued the last 2 printed pieces onto the front and back of the drawer.


I punched 2 small holes into the front of the drawer for the ribbon.

Glue the square tabs inside to form a drawer.

Wednesday, November 20, 2019

Altered Altoids Tin


I've been working on this altered Altoid Tin for a while. This is my 2nd one. I covered the entire tin with white gesso to prep the surface for the paint. After that dried, I used some Ranger Opaque Crackle Texture Paste in a few spots. I then used Folk Art Acrylic Paint in "Silver Marlin" randomly painted. I added some white acrylic paint in the same way. To add some aging I used Finnabair Patina Effect Pastes in Blue and Mint Green This came in a 3 jar set with a jar of Brass metallic paste. I used all 3 on every metal surface here: the compass the key, the band. I tied a piece of lace ribbon around the perimeter of the tin after aging it with some pigment ink. I used random scraps of paper and stamped Paris on the paper. The stamp is from a Tim Holtz stamp set.
The back of the tin.

The side view key and lace ribbon.